Note: We have an official Proton VPN app for macOS that provides the easiest way to connect to our servers and allows you to benefit from many of Proton VPN’s advanced features. For example:
- Kill switch and permanent kill switch
- WireGuard and Stealth protocols
- Smart protocol
- DNS leak protection
- NetShield Ad-blocker
- Moderate NAT
- VPN Accelerator
You can also connect to Proton VPN servers manually using the following VPN protocols:
- OpenVPN (using TunnelBlick)
- WireGuard (using any “vanilla” WireGuard client, including the official open-source app)
- IKEv2 (using the built-in macOS VPN client)
In this guide, we show you how to manually configure devices running Mac OS X 10.11 (El Capitan) or newer to connect to our servers using the IKEv2 protocol.
Please note that connecting in this way means you will not benefit from the advanced features available through the official Proton VPN macOS app. Please also note that even if you do wish to use manual setup, we recommend using WireGuard instead of IKEv2.
Learn how to manually configure WireGuard on macOS
macOS manual IKEv2 VPN setup for Proton VPN
1. Import the Proton VPN IKEv2 certificate.
Click here to download the certificate, and open it in Finder. This will open the Keychain Access app, and you will be asked to verify that you wish to import the certificate into your Keychain.
2. Trust IKEv2 connections using the certificate.
In Keychain Access, find the Proton VPN Root CA → right-click → Get info. (The same certificate will appear in both the login and System Roots keychains. You can edit either instance.)
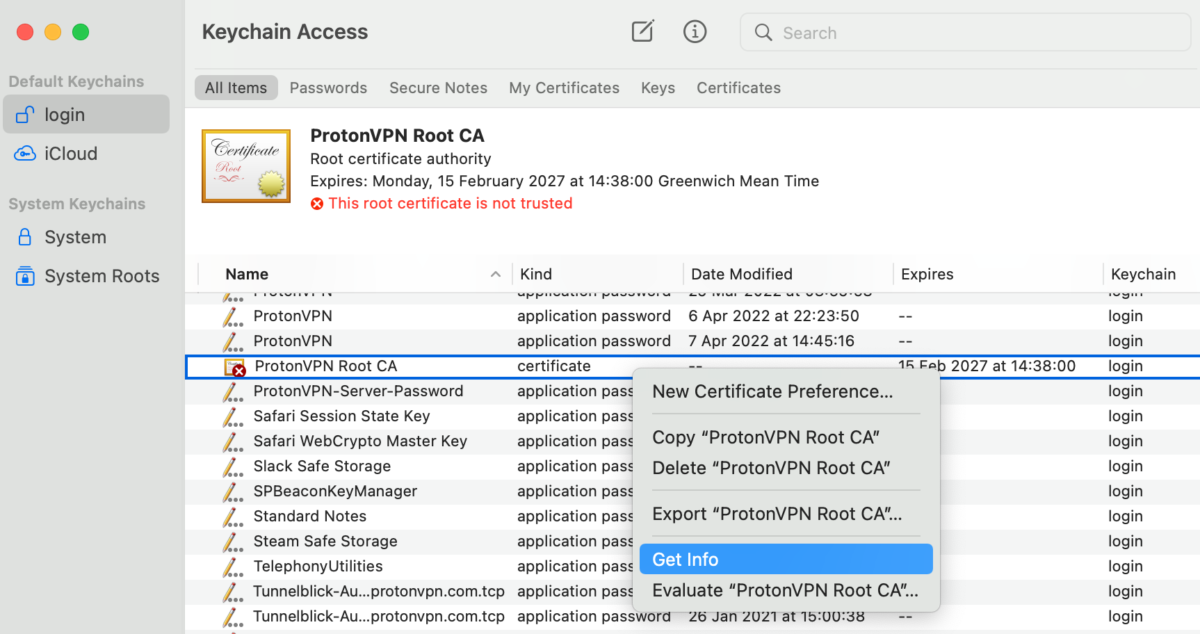
3. Trust IKEv2 when using the certificate.
Using the dropdown menu next to IP Security (IPsec), select Always Trust. You do not need to trust this certificate for any other purpose. Be sure to close the window when you’re done (x), at which point you will be asked to verify the changes using your password or biometrics.

4. Go System Preferences → Network → +.

5. Create a new network interface.
Select:
- Interface: VPN
- VPN Type: IKEv2
- Service name: Choose any name for the VPN connection that makes sense to you

6. Enter VPN server details.
Enter the name of the VPN server you would like to connect to into both the Server Address and Remote ID fields. Click Authentication Settings… when you’re done.

To find the names of our VPN servers, log in to account.protonvpn.com using your browser and go to Downloads → OpenVPN Configuration files → select the server you would like to connect to, and in the Actions column next to it, click the dropdown icon to see the server name.
Clicking on the server name will save it to your clipboard for easy pasting into the macOS Settings menu.

7. Ensure authentication by Username is selected (it is by default), and enter your IKEv2 login details. Click OK when you’re done.

These IKEv2 login details are not the same as your regular Proton VPN login details. To find your IKEv2 login details, log in to account.protonvpn.com and go to Account → OpenVPN / IKEv2 username.

8. Back on the main Network Settings screen, click Apply to finish setting up the new VPN connection and Connect to establish a VPN connection to our server.
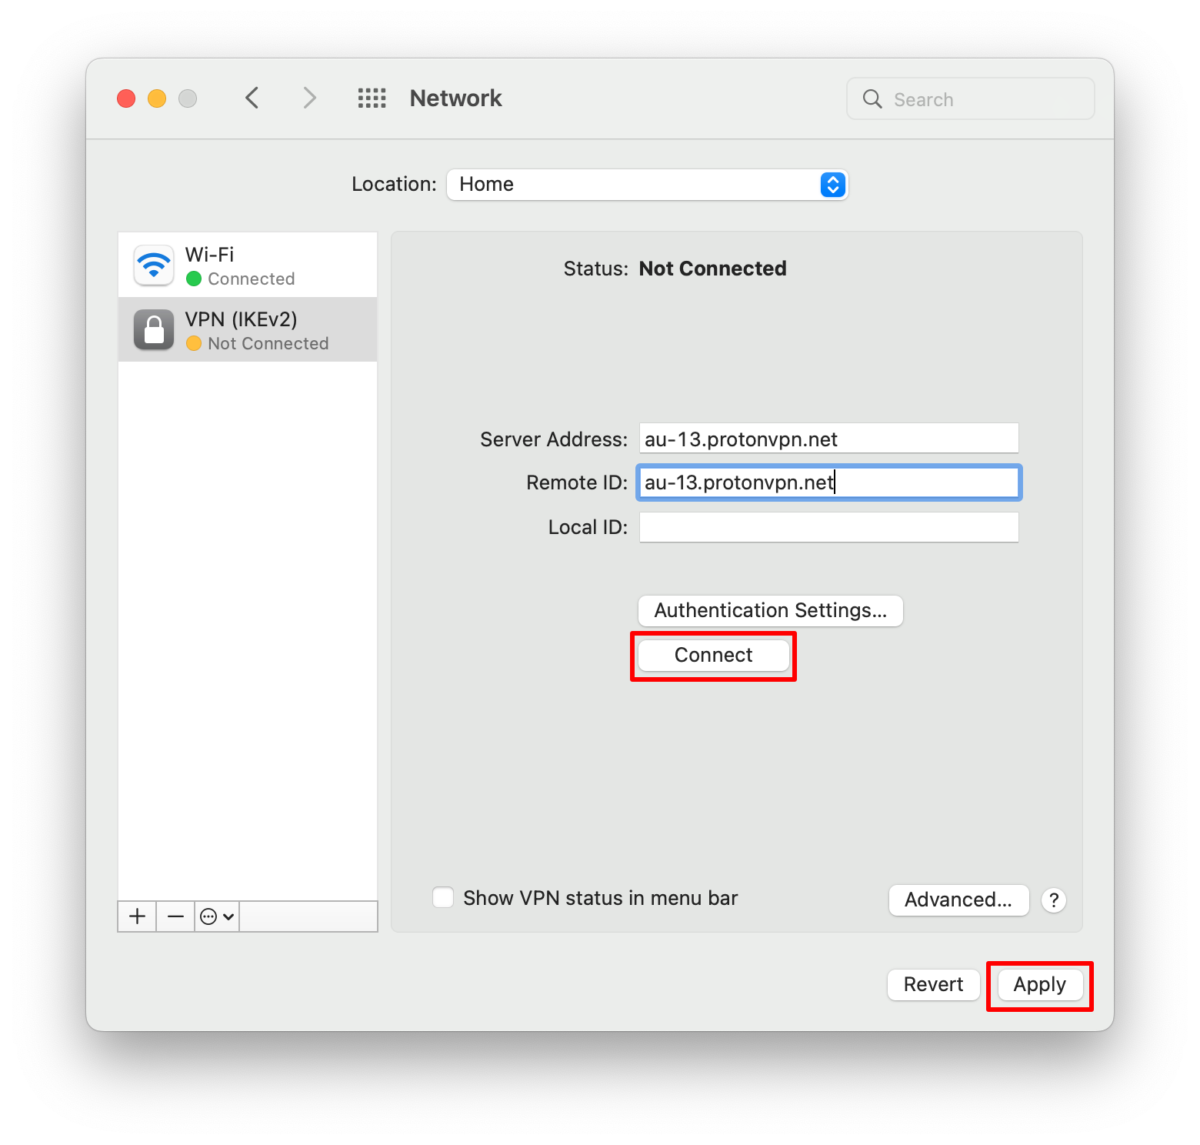
You are now connected to Proton VPN using IKEv2!

Related articles:
Proton VPN macOS OpenVPN setup
Proton VPN iOS IKEv2 manual setup