In this article, we are going to cover the basic VPN setup process on an OpenWRT router so that it can connect directly to the Proton VPN servers.
Learn more about why you should set up a VPN on your router.
We don’t recommend setting up a VPN connection if you aren’t a tech-savvy user. Please be aware that OpenWRT 18.06 is no longer officially supported. We therefore suggest updating to OpenWRT 21.02, which supports the newer and faster OpenVPN 2.5.
1. Install required packages
Install openvpn-openssl and luci-app-openvpn to manage OpenVPN on your router using the web interface. A new page in the web interface should appear.
Navigate to VPN tab→ OpenVPN to open the OpenVPN config management page.
2. Upload and edit an OpenVPN config file
This is available starting with the OpenWRT 19.07.
Log in to your Proton VPN account and download the desired OpenVPN configuration files by selecting the Router option.
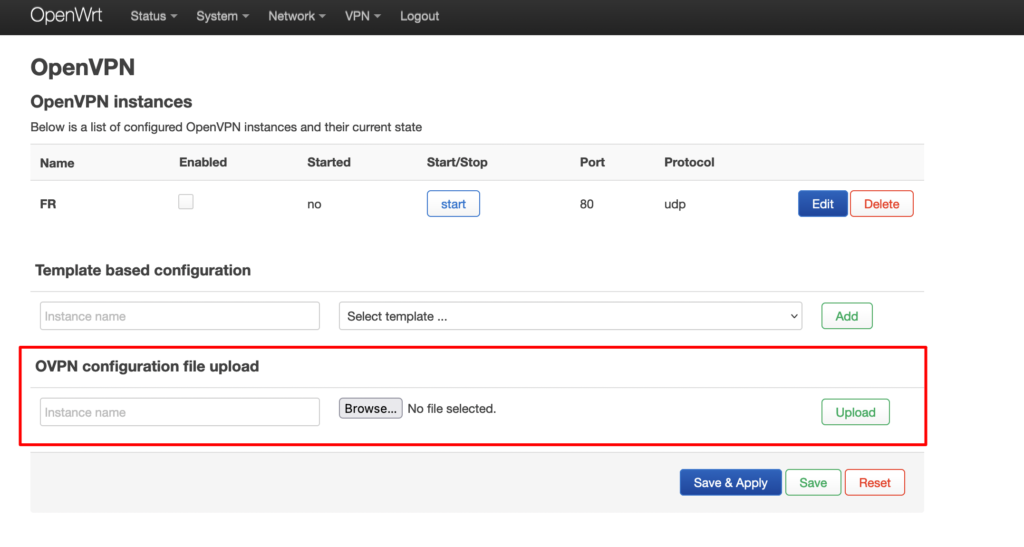
Now go back to OpenVPN on your router config page. Go to OVPN configuration file upload → Browse… , locate the configuration file that you have just downloaded, give it a name, and Upload it.
The configuration file will appear in the table under OpenVPN instances. Click Edit next to it.

In section 1, look for the line beginning with auth-user-pass. Edit it to add the full path to the username/password .auth file. This can be found at the end of the heeding for section 2.
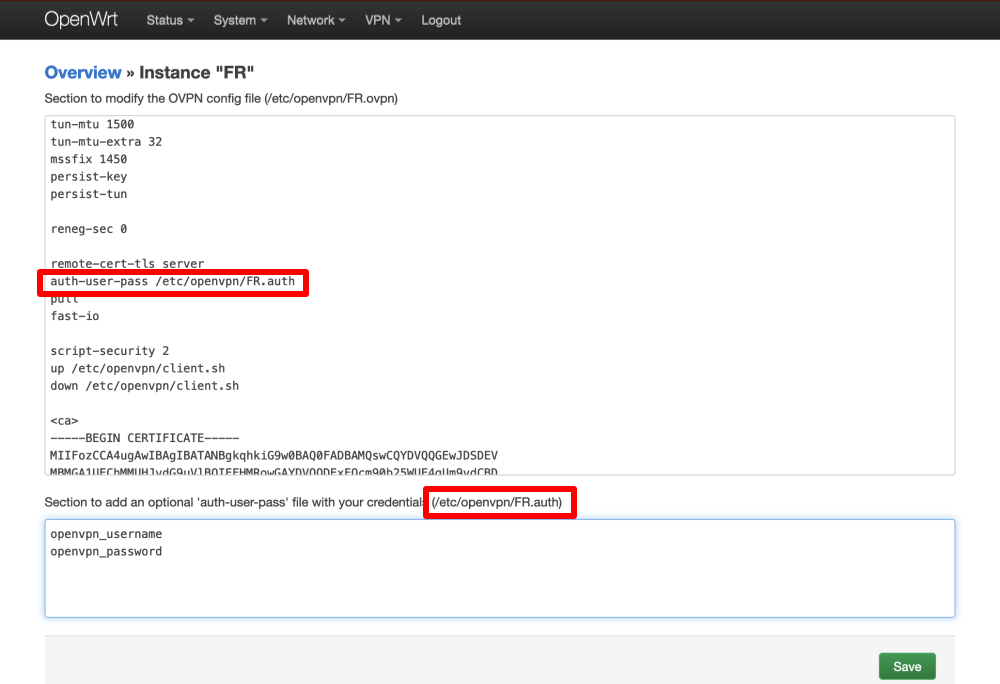
In section 2, enter your OpenVPN username and password (which are different from your regular Proton VPN account details). To find these, log into your Proton VPN account and go to Account → OpenVPN / IKEv2 Username.
Note: to use our NetShield DNS filtering feature, append the suffix +f1 to your username to block malware, or +f2 to block malware, ads, and trackers (for example 123456789+f2).
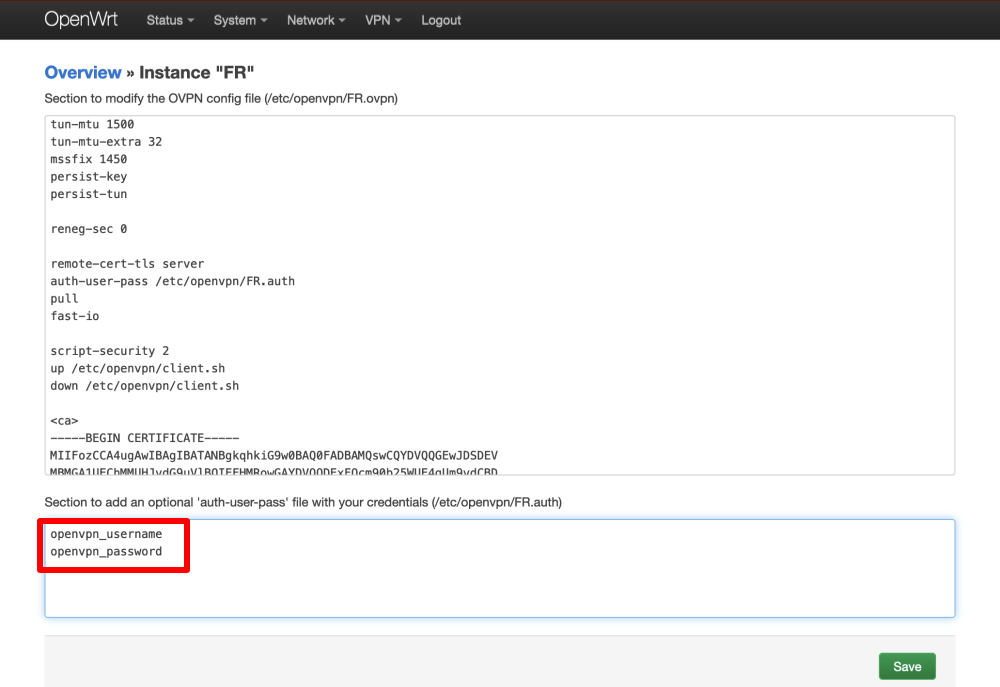
Return to section 1 and add the following lines to the configuration file. Note: this is not required for OpenWRT 21.02+.
script-security 2
up /etc/openvpn/client.sh
down /etc/openvpn/client.sh

Save the configuration file.
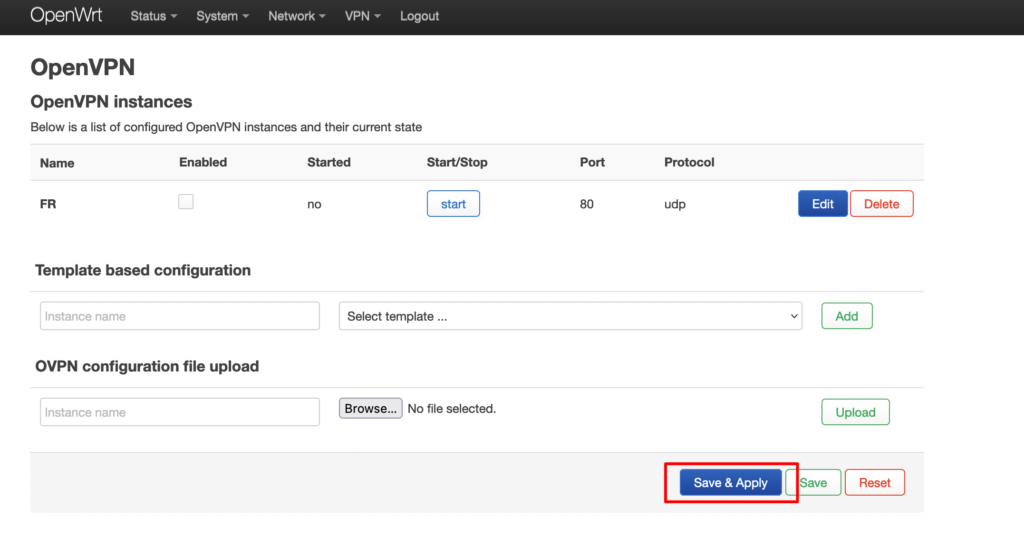
Go back to the VPN tab → OpenVPN and click on Save & Apply.
3. Add DNS updater script (skip this step if running OpenWRT 21.0+)
Log in on your router via SSH client with root user. Type the following in the terminal:
cat << "EOF" > /etc/openvpn/client.sh
#!/bin/sh
env | sed -n -e "
/^foreign_option_.*=dhcp-option.*DNS/s//nameserver/p
/^foreign_option_.*=dhcp-option.*DOMAIN/s//search/p
" | sort -u > /tmp/resolv.conf.vpn
case ${script_type} in
(up) uci set dhcp.@dnsmasq[0].resolvfile="/tmp/resolv.conf.vpn" ;;
(down) uci revert dhcp ;;
esac
/etc/init.d/dnsmasq restart &
EOF
chmod +x /etc/openvpn/client.sh
Exit your shell.
4. Start and enable the client
Start the client by pressing the Start button in the table of available configurations. This can take up to 10 seconds to complete, as OpenVPN startup and shutdown are slow.
If you want this VPN client connection to start on boot and always remain active, tick the Enabled checkbox.
Click Save & Apply to save changes.
5. Firewall
At this point, the VPN is set up and your router can use it. However, the devices in the LAN of your router won’t be able to access the Internet anymore. To do this, you need to set the VPN network interface as public by assigning a VPN interface to WAN zone.
Click on Network in the top bar and then on Firewall to open the firewall configuration page, then click on the Edit button of the wan (red) zone in the Zones list at the bottom of the page.

Click on the Advanced Settings tab and select the tunX interface (tun0 in the screenshot, which is the most likely if you have a single OpenVPN client/server running). Click Save, then Save & Apply.

Click on Status on the top bar and then click on System Log to see the interface name.
A few lines from the system log where you can see the interface name of the OpenVPN client started with the configuration file FR
Mon Nov 23 09:58:54 2020 daemon.notice openvpn(FR)[3416]: /sbin/route add -net 0.0.0.0 netmask 128.0.0.0 gw 10.20.0.1
Mon Nov 23 09:58:54 2020 daemon.notice openvpn(FR)[3416]: /sbin/route add -net 128.0.0.0 netmask 128.0.0.0 gw 10.20.0.1
Mon Nov 23 09:58:54 2020 daemon.notice openvpn(FR)[3416]: Initialization Sequence Completed
6. Run a test
Establish the VPN connection. Verify your client traffic is routed via VPN gateway.