Port forwarding routes connections through the firewall Proton VPN uses to protect our customers. It’s mainly useful to people downloading and sharing files using P2P protocols such as BitTorrent, although it can also improve performance for online gamers.
Learn more about port forwarding
Port forwarding is available on our Windows app and our new beta Linux app. However, it’s also possible to use port forwarding on other devices that are manually configured to connect to Proton VPN using our OpenVPN or WireGuard configuration files.
- Configure VPN settings for OpenVPN
- Configure VPN settings for WireGuard
- How to manually port forward on Linux
- How to port forward on macOS
- Technical notes
Step 1: Configure VPN settings
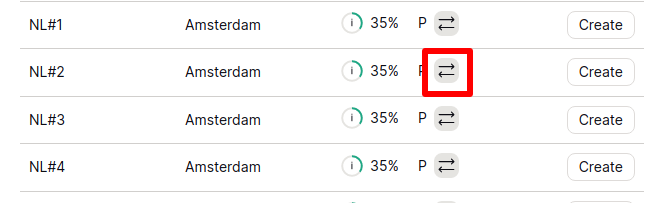
All our P2P servers support port forwarding. P2P servers can be easily identified in our apps and on our VPN configuration download pages by a double-arrow icon.
OpenVPN
1. Sign in to your Proton VPN Account and go to Account→ Downloads → OpenVPN configuration files. Select a VPN server that supports P2P (double-arrow icon) and download its OpenVPN configuration files.
2. Configure your OpenVPN client (such as OpenVPN GUI for Windows, Tunnelblick for macOS, or the OpenVPN CLI or NetworkManager GUI for Linux).
Remember that your OpenVPN login username and password are different from your regular Proton Account username and password. You can find them in your Proton VPN Account by going to Account→ OpenVPN / IKEv2 username.
To use port forwarding, add the suffix +pmp to your OpenVPN username. For example, if your OpenVPN username is “myusername2023”, use “myusername2023+pmp”.
Note that you can use the +pmp suffix with other suffixes supported by Proton VPN. For example, to use port forwarding and our Netshield Ad-blocker feature, your username might be “myusername2023+pmp+f2”.
3. Connect to Proton VPN. To check that you’re connected and the VPN is working correctly, visit ip.me or open a Terminal window on macOS or Linux and enter curl ip.me.
WireGuard
1. Sign in to your Proton VPN Account and go to Account→ Downloads → WireGuard configuration.
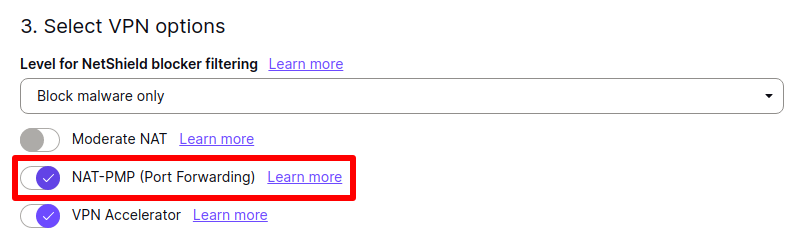
2. Select a VPN server that supports P2P (double-arrow icon) and generate a WireGuard configuration file. When doing this, ensure that Select VPN options → NAT-PMP (port forwarding) is enabled.
3. Download the generated WireGuard configuration file and use it to configure your WireGuard client. See our sample guide to installing WireGuard with Proton VPN on Ubuntu using Network Manager.
4. Connect to Proton VPN. To check that you’re connected and the VPN is working correctly, visit ip.me or open a Terminal window on macOS or Linux and enter curl ip.me.

Step 2: How to use port forwarding
Linux
The easiest way to port forward on Linux is by using our new beta Linux app. The following guide shows you how to port forward manually.
The example below shows you how to create the correct port mappings on Linux using natmpmpc.
1. Connect to the VPN with port forwarding (NAT-MMP) enabled, as described above.
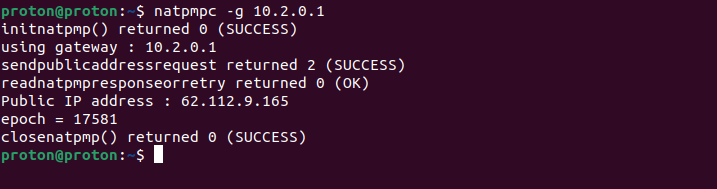
2. Check that port forwarding is allowed on the server you’re connected to. To do this, open a terminal window and enter:
natpmpc
If port forwarding is permitted on the server you are connected to, the output will look like this:
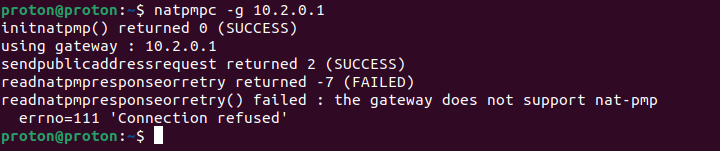
If this test fails (see screenshot below), please return to Step 1 of this guide, select a different P2P server, and ensure your VPN connection is configured correctly.
3. Create a UDP port mapping on UDP, needed for port forwarding. Enter:
natpmpc -a 1 0 udp 60 -g 10.2.0.1
In the example below, port 53186 has been allocated for this.
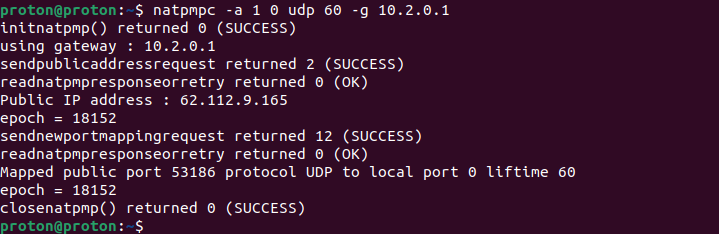
4. Create a port mapping on TCP.
natpmpc -a 1 0 tcp 60 -g 10.2.0.1
In the example below, port 53186 has been allocated for this.

5. Finally, loop natmpmpc so that it doesn’t expire. Enter:
while true ; do date ; natpmpc -a 1 0 udp 60 -g 10.2.0.1 && natpmpc -a 1 0 tcp 60 -g 10.2.0.1 || { echo -e "ERROR with natpmpc command \a" ; break ; } ; sleep 45 ; done
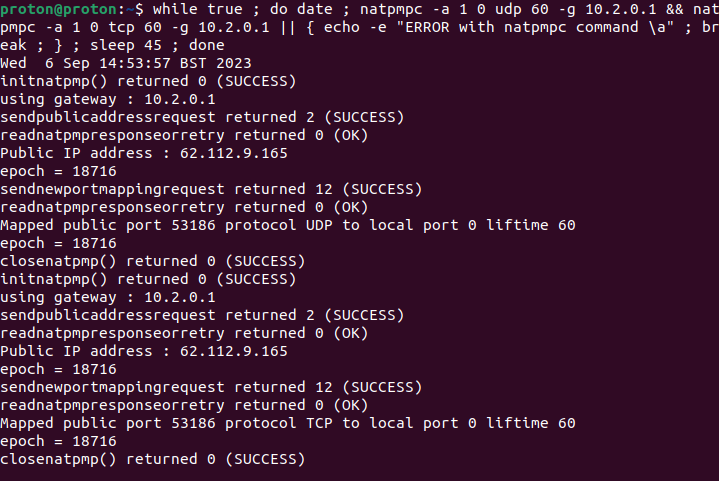
Port forwarding is now activated. Note that closing your terminal window will terminate the loop process. You will need to re-run this loop script each time you want to start a new port forwarding session or the port will only stay open for 60 seconds.
6. In your BitTorrent client, disable UPnP / NAT-PMP port forwarding from your router and paste the local port number displayed in the connection output (see above), into the port forwarding section of your BitTorrent client.
For example, on qBittorrent, go to Tools → Preferences... → Connection → Listening port → paste the port number into Port used for communications field. Below it, uncheck Use UPnP / NAT-PMP port forwarding from my router (it’s enabled by default). Click OK when you’re done.

Port forwarding is now configured.
macOS
Get an OpenVPN or WireGuard config file from ProtonVPN, making sure the server supports P2P and the NAT-PMP toggle is enabled.
1. Connect to the VPN with port forwarding (NAT-PMP) enabled, as described above.
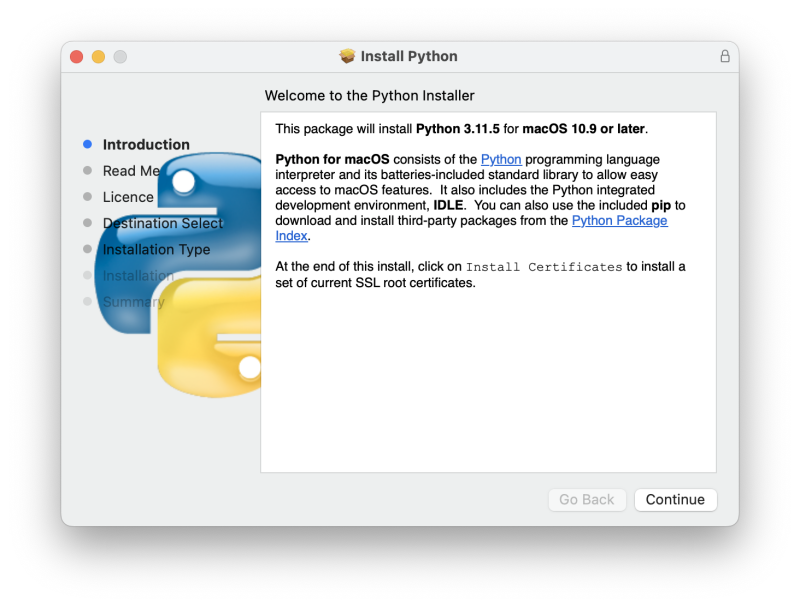
2. Download Python 3 as a DMG and install it. You’ll need to allow the app by going to Privacy & Security → Security.
3. Install Pip. To do this, open Terminal and enter:
curl https://bootstrap.pypa.io/get-pip.py -o get-pip.py
Followed by:
python3 get-pip.py
Then run:
python -m pip install py-natpmp
Make a note of the directory where the natpmp-client.py script is installed. In our case, it’s /Library/Frameworks/Python.framework/Versions/3.11/bin.

4. Request a port using NAT-PMP. Run:
cd /Library/Frameworks/Python.framework/Versions/3.11/bin && python3 natpmp-client.py -g 10.2.0.1 0 0
(If different, replace the cd path with the path to the directory you noted in step 4.)

Port forwarding is now enabled.
5. In your BitTorrent client, disable UPnP / NAT-PMP port forwarding from your router and paste the local port number displayed in the connection output (see above), into the port forwarding section of your BitTorrent client.
For example, on qBittorrent, go to Tools → Preferences... → Connection → Listening port → paste the port number into Port used for communications field. Below it, uncheck Use UPnP / NAT-PMP port forwarding from my router (it’s enabled by default). Click OK when you’re done.

Port forwarding is now configured. However, there is an issue on macOS where you may periodically receive the error:
OSError: [Errno 12] Cannot allocate memory
If this happens:
1. Download this python script and copy it into the directory where the natpmp-client.py script is installed. (In our case, /Library/Frameworks/Python.framework/Versions/3.11/bin.)
2. Run the script with the following command:
cd [directory] && ./natpmpc-mac.sh
For example
cd /Library/Frameworks/Python.framework/Versions/3.11/bin && ./natpmpc-mac.sh
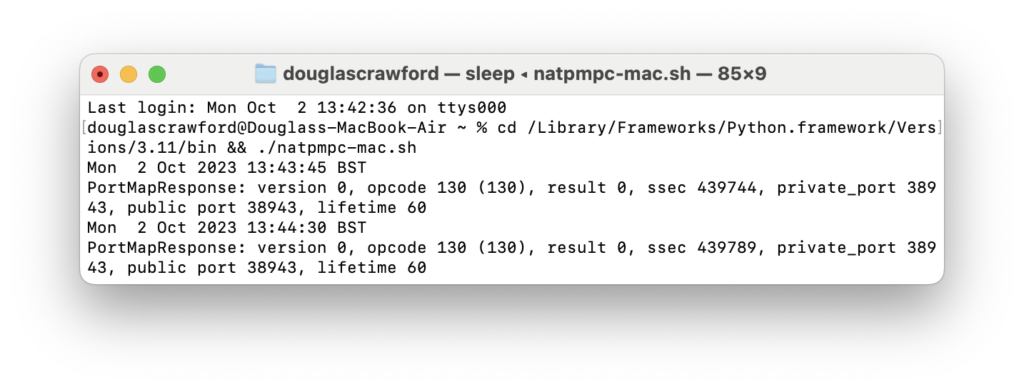
Note that you’ll need to leave the Terminal window open for the script to continue working. To disable the bell notification each time the script loops, go to menu bar → Terminal → Settings → Profiles tab → Advanced → Bell and uncheck Audible Bell.
Technical notes
1. Our extension to the NAT-PMP protocol uses internal/external ports 0/0. This is a Proton VPN customization that follows rfc6886 for NAT-PMP implementation to assign a random external port but adds custom handling of requests to ports 0/0.
Our extension to the NAT-PMP protocol uses internal/external ports 0/<any>. This is a Proton VPN customization that follows rfc6886 for NAT-PMP implementation to assign a random external port, but adds custom handling for requests to ports 0/<any>. This allows you to map a local port to an external port.
2. These instructions have very little in the way of error handling. Best practice would be to parse the return code and output of natpmpc, but we haven’t done that here to keep this guide as simple as possible. You can find a good example of correct error handling here (but please note that Proton VPN has no affiliation whatsoever with this Reddit discussion).